Showing posts with label RECIPES. Show all posts

Monday, August 4, 2014

Panzanella

So what do you do when you have a loaf of crusty bread you baked yesterday and a garden full of ripe red tomatoes and fresh basil?
You make Panzanella!
The bread is an easy no-knead wet dough loaf that rises overnight.  The Basil is Genovese type from Italian imported seeds and the tomatoes are Costoluto Fiorentino, also from Italian seeds.  There is a rule about heirloom garden tomatoes - the uglier and gnarly the tomato - the better and tastier it is - so you can guess that these are spectacular tomatoes!

The recipe? - Oh yeah, the recipe.  If you can't figure it out from the photos...... well - just saying.

OK - not to be rude to the culinary challenged - Cut some of the bread into cubes and dry it out in the oven on a cookie sheet.  300 degrees for 5-10 minutes, or use stale bread.  Drizzle with olive oil. Chop the tomatoes and add them and any juice too.  Tear up the Basil and add that.  Sprinkle a little salt and pepper and toss.  It is common to sprinkle a little red wine vinegar over the finished salad.  I like it that way.  It's also common in Northern Italy to add some shaved Parmesan - which I also like but don't have any..... tsk, tsk.  In Tuscany, where this dish originated, they don't usually add cheese.

How 'bout that food styling backdrop in the photos!  I wanted to hide all the stuff on the kitchen counter - FLASH!  I'll prop up some of my color coded cutting boards!  Yeah lame, I know.  Get over it.  It's less distracting than the clutter on the counter.

Monday, July 21, 2014

Tomatillo Salsa

Ingredients:
2 lbs fresh tomatillos
1 large white onion (yellow is OK too)
4 large cloves of garlic
4 medium Hatch New Mexico green chiles (gotta be the real thing! - aaah, no they don't - if you use Anaheim chiles from the grocery store you probably will want to add a jalapeno chile for some heat)
1 tsp salt
1/4 tsp fresh ground black pepper
2-3 Tbs fresh squeezed lime juice.
1-2 tsp olive oil
1/4 cup chopped cilantro
water as needed

Tomatillos - just picked
 Method:
Remove the husks and wash the tomatillos.  If you have never used tomatillos before - don't be freaked out by their sticky feel - that's normal and OK and goes away when cooked.
Tomatillos - husked, washed and ready.
The other stuff - the onion and the green chiles are from our garden - next year the garlic will be too.
Roast the chiles on the grill outdoors (my method) or under the broiler or right on gas stove top burner until they are charred all over and look like this.
Roasted New Mexico green chiles
Put the roasted chiles in a bowl, cover tightly with plastic wrap and set aside for 20 minutes to steam.
When the chiles are cool, cut off the tops, peel off and discard the charred skins.

In a roasting pan - put the whole tomatillos, rough chopped onion, rough chopped garlic and the rough chopped roasted peeled green chiles (and rough chopped jalapeno, if using).  Add the oil and toss to coat.  Sprinkle on the salt, pepper, and lime juice.
Roast in a preheated 375 degree oven for one hour until the tomatillos are tender and blackened a bit in spots.  Puree the roasted veggies in a blender or food processor, adding water as needed to get the right consistency.  What is the right consistency you ask?  I give up - what is the consistency you like?  That's the right consistency.  Serve warm or at room temperature.  Add the fresh chopped cilantro just before serving.  Lasts a week in the fridge.  Great as tortilla chip dip, of course, but also great as a taco sauce or green enchilada sauce (although I make a different green chile enchilada sauce - smooth Sante Fe style for chicken enchiladas.  I'll post that recipe when all the chiles are ready to harvest.)

I made a larger batch of salsa from the 3 1/2 lbs of tomatillos we harvested yesterday and adjusted the proportions of the other ingredients accordingly.  I canned the sauce in pints jars - so after roasting the veggies I transferred it all to a sauce pan, used an immersion blender to puree it, adding enough water to make a sauce just a little thinner than canned tomato sauce.  I pressure canned it - processing the jars for 20 minutes at 10 psi so I did not have to worry about it being acidic enough for water bath canning.
The finished Tomatillo Salsa

Tuesday, June 17, 2014

Pesto - Basil, Basil and more Basil

We are growing two types of Basil in the garden, Genovese and Lettuce Leaf,  both from Bavicchi brand seed imported from Italy and purchased from Italian Seed and Tool.
Lettuce Leaf Basil - about 18" tall plants
We started some Lettuce Leaf Basil indoors on early spring and transplanted it to the garden in May.  It is lush and vigorous and smells so good.  The Genovese Basil and more Lettuce Leaf Basil were direct sown in the garden in May and are still a ways off from harvest size.

I harvested a whole plant the other day and made fresh Pesto for roasted eggplant, roasted pepper, & mozzarella panini.  Yummy.  Here is my recipe for Basil Pesto.  I use walnuts because they are so much easier to get and aren't as expensive as pine nuts.  Yes - it's still classic Pesto if you use walnuts.

BASIL PESTO

Ingredients:
 2 cups packed Basil leaves
1/2 cup walnut pieces
3 peeled garlic cloves
1/2 tsp fresh ground black pepper
1/2 cup grated Parmesan cheese
1/2 cup extra virgin olive oil

Method:
Put all the ingredients except the olive oil into the bowl of your food processor or blender.
Pulse a few times to chop and mix until you like the consistency of the basil and walnuts.
With the motor running - slowing add the olive oil to make a thick emulsion.

Easy and delicious.  Adjust the amounts of the ingredients to your liking.  There are no Pesto Police.  

Did you know there is a little hole in the bottom of the cylindrical 'pusher' on your food processor.  It is there so you can pour in the oil all at once and it will slowly drain into the bowl in a thin stream - the perfect 'add slowly' regulator.  Really - that's what it's there for.  Pesto freezes well for future use.  Top off your container of pesto with some extra olive oil floated on top before putting it in the freezer.  Defrost slowly in the refrigerator for a couple of days and pour off the extra oil on top before mixing well and using.  Add oil to the top of any leftover you want to store in the fridge to keep it fresh and bright green.


Wednesday, April 30, 2014

Grilled Wild Spring Onions

Wild onions grow everywhere here, and I mean everywhere.  In the pastures, in the lawn, along the roads, in fallow plowed ground especially.  They are a real treat to pull, clean and grill as an accompaniment to any meat cooked on the grill.  These onions are very mild and delicious.  Very young ones can be minced well up their thin green stalks and used raw like chives or scallions in salads, soups, baked potatoes and so forth.  As they grow larger the stalks grow tougher, but the small bulb and white part of the stem can still be tender.
Wild onions just pulled and washed with a strong blast from the hose to remove all the mud

Roots and upper stalks trimmed off and washed well at the kitchen sink.
 A couple of the tougher layers have been pulled off the stem and bulb so the onion is more tender.

Coat the onions lightly with olive oil and season with just salt and pepper.
Place them directly on the hot grill and use the stalks as handles to turn them frequently.

Ready to enjoy!  Just eat the bulb.  Mild and delicious.  If you didn't pull off enough tough outer layers, be a little more aggressive with your trimming next time and/or use younger smaller onions.  In the meantime, if the onions are a bit tough on the outer layer, strip the tender inner bulb out of the stalk by running it through your teeth or popping it out of the stalk with your thumb and index finger.

Thursday, December 26, 2013

Wild Turkey

My daughter Marissa and son-in-law Justin came for an overnight stay the weekend before Christmas.  We had our family Christmas celebration and gift exchange while they were here.  For our Christmas feast I cooked some of our traditional dishes - butternut squash with white cheddar cheese, creamed onions, ham with raisin sauce, baked apples and a new center piece dish - ROAST WILD TURKEY!  My cross-the-road neighbor Allen Green gave me a beautiful 12 pound (dressed) wild turkey he got on the edge of one of his pasture / woodland margins (about a 17 pound gobbler, live weight).  Everyone who says wild turkey is more flavorful than commercially raised turkey is 100% right - and of course it's the ultimate organic free range bird and not pumped up with hormones or injected with salt water.  It was delicious.
 

First I seasoned the cavity with salt, pepper and thyme, stuffed it with celery, lemon halves, and bunches of sage and parsley.  Next I lightly coated the bird with olive oil and dusted it with a mixture of flour and corn starch.   (this helps browning later).  Then I seasoned with salt, pepper, thyme, poultry seasoning and sage.  I placed the bird on a bed of celery in a large roasting pan, draped the bird with strips of applewood smoked bacon over the breasts, legs and thighs, added a cup of chicken broth to the pan, and sealed it up tight with aluminum foil.  I roasted it for 15 minutes per pound at 325, basting it every 1/2 hour and resealing the foil each time.  After 3 hours I raised the oven temperature to 375, removed the foil and the bacon and roasted it for an additional hour, basting the bird every 15 minutes.  After removing it from the oven I covered it with the foil once again and let it rest for 45 minutes before carving.  I have to admit that the wings, which were very meaty because they actually use those suckers to fly, were tough, but all the rest was tender and flavorful.  Really a great meal.   

Thursday, October 3, 2013

Recipe: Basic soft white bread

This recipe is my personal adaptation of many subtly different recipes I have come across for basic soft white sandwich bread.  It makes one excellent large easy to make 1.5 pound loaf.  Measuring the flour by weight is key, I think, in all baking.  If you don't own a kitchen scale - buy one.  They are not that expensive and will improve all your baking significantly.

Ingredients:
20 oz. unbleached white bread flour
1 Tbs. active dry yeast
1 Tbs. honey
2 Tbs. oil or  2 Tbs. butter, vegetable shortening or lard - melted and cooled a little
1 tsp. salt
1.5 cups milk, scalded and cooled to about 100oF or 1.5 cups warm water and 1/2 cup dry milk.


Tools:
4 quart bowl
2 quart bowl
four sifter
wooden spoon
glass measuring cup for liquids
1 Tbs. measuring spoon
1 tsp. measuring spoon
9x5 bread loaf pan


Method:
Set a large bowl on the kitchen scale and zero the scale.
Add flour to a sifter and sift the four into the bowl until you have 10 oz.
Remove the large bowl and set a smaller bowl on the scale and zero the scale.
Sift 10 oz. of flour into this bowl.

Add all the remaining ingredients except the salt to the larger bowl of flour.
Vigorously beat with a wooden spoon to make a smooth batter (called a "poolish")
Set the bowl aside for 15-30 minutes until the yeast becomes active and starts to expand the batter.
If you get involved in something else - no problem, you can let the poolish ferment for up to 4 hours on the countertop or  24 hours in the refrigerator.
The 2nd 10 oz. of flour, salt and the active "poolish"
Add the salt to the poolish and mix in enough of the flour from the small bowl until the dough comes together and pulls away from the side of the bowl.  DO NOT ADD ALL THE FLOUR!
You should have about a 1/3 to 1/2 cup of flour remaining in the small bowl.
Sprinkle your clean counter top or other kneading surface with some of the remaining flour.
Dump the rough dough blob onto the flour, scrap the dough off your wooden spoon and sprinkle the top with some more of the remaining flour.  Let the dough rest for a few minutes while you wash your wooden spoon and large mixing bowl.  Rub some flour on your hands and begin kneading the dough - adding very small amounts of flour to the dough and dusting your hands with flour only as needed to keep the dough from sticking a lot.  If the dough seems just too sticky just let it rest for 10 minutes covered with a tea towel - it won't be so sticky after resting.  Knead the dough for about 10 minutes.

Kneading doesn't have to be one long aggressive marathon.  Take short breaks if you don't have lots of arm strength and stamina yet and let the dough and you rest.  There are three things you are trying to accomplish at this stage:
(1) Try not to add all the flour to the dough.  Try to have a few Tbs. of flour left over at the end, but if you don't - no sweat.
(2) knead the dough well for a total of 10 minutes and if that takes a 1/2 hour with rests - that's fine.
(3) ENJOY - this should not be stressful AT ALL.  If it is - you are going at it too frantically. relax.
Kneaded dough and remaining flour
OK - we have all heard that well kneaded bread dough should be springy, elastic, and smooth as a baby's bottom. Yes - but not a dry powdered baby's bottom.  Dough like that has too much flour in it.  It should be more like a baby's bottom with lotion on it - smooth and slightly moist, not bone dry.  While kneading the dough it should be slightly tacky - like a 'sticky note' but not outright sticky.  If with rapid kneading motion the dough pulls off your hand like a 'sticky note' and leaves no residue - that is about right.

Return any remaining flour to its' container, wipe out the bowl and coat the interior with a small amount of oil (about a 1/4 to 1/2 tsp.).  Plop in the dough, swirl it around in the oil, flip the dough over and swirl around again to coat the entire surface with oil.  Set the bowl aside, cover with a towel and let the dough rise until double in size.
dough after the 1st rise
What's double?  Many new bakers over do this step.  Double means double and no more.  To calculate this, plop the kneaded dough into a large 1 quart measuring cup and see how much dough you have.  It will be about a quart for this recipe.  Remove the dough and measure water into a smallish bowl equal to twice the amount of dough.  Find a bowl that is completely filled with that amount of water or make a mental note of how high the water level is in the bowl you want to use.  That full small bowl or noted mark is your guide for "double".  I'll bet the bowl is smaller or the water mark is lower than you had thought "double" was - isn't it?  Also, the time it takes for the dough to double is so variable it is useless as guide and is totally irrelevant. Ingredient temperature, room temperature, humidity, freshness of the yeast, vigorousness of kneading, amount of salt in the dough, - all effect the time it will take for the dough to double.  When recipes say "..... let the dough rise for about xxxx minutes or about an hour....until double in volume",  ignore the time.  

I use a 4 quart stainless steel restaurant utility bowl to mix the dough in and a 2 quart bowl for the 2nd portion of flour and for the 1st rise of the dough.  When the bowl is full my dough is "doubled".  I have a bunch of these stainless steel bowls in a variety of sizes and use them for all my kitchen work.  They are light weight, sanitary, indestructible, and incredibly cheap at restaurant supply stores.

When the dough has doubled in bulk, grease your loaf pan with butter, vegetable shortening, lard or baking spray.  Turn the dough out onto your clean kneading surface, deflate the dough and shape it into a log as long as your loaf pan.

This is another step that concerns a lot of new bread bakers because many, actually most, recipes say to "gently deflate the dough".  Baloney!  The dough must be thoroughly deflated to ensure you don't get large empty bubbles in the loaf.  Squeeze it, mash it, I actually knead it for a few turns - then shape it into a log that fits the pan and put the dough into the pan.  This is not a soufflĂ© that you need to tip-toe around.  You do not have to treat it gently.
Shaped dough in 9x5 greased loaf pan
Cover the pan with a towel and let the dough rise a second time.  When the dough has just reached the top of the pan - preheat your oven to 350oF with the rack in the middle of the oven.  When the oven is heated and the dough has risen to an inch over the top rim of the loaf pan - Bake for 20 minutes and then tent with a piece of foil to prevent over browning and bake an additional 20 minutes.
after 20 minutes - now tent with foil
Remove form the pan immediately and cool the loaf on a wire rack.  You can brush the loaf with softened butter while it is still very warm to get an extra moist soft crust if you like.  The loaf should cool for one hour before slicing.  Stand guard over your creation and be prepared to beat back the voracious barbarians ready to pounce on the warm bread.  Good luck - this never works.
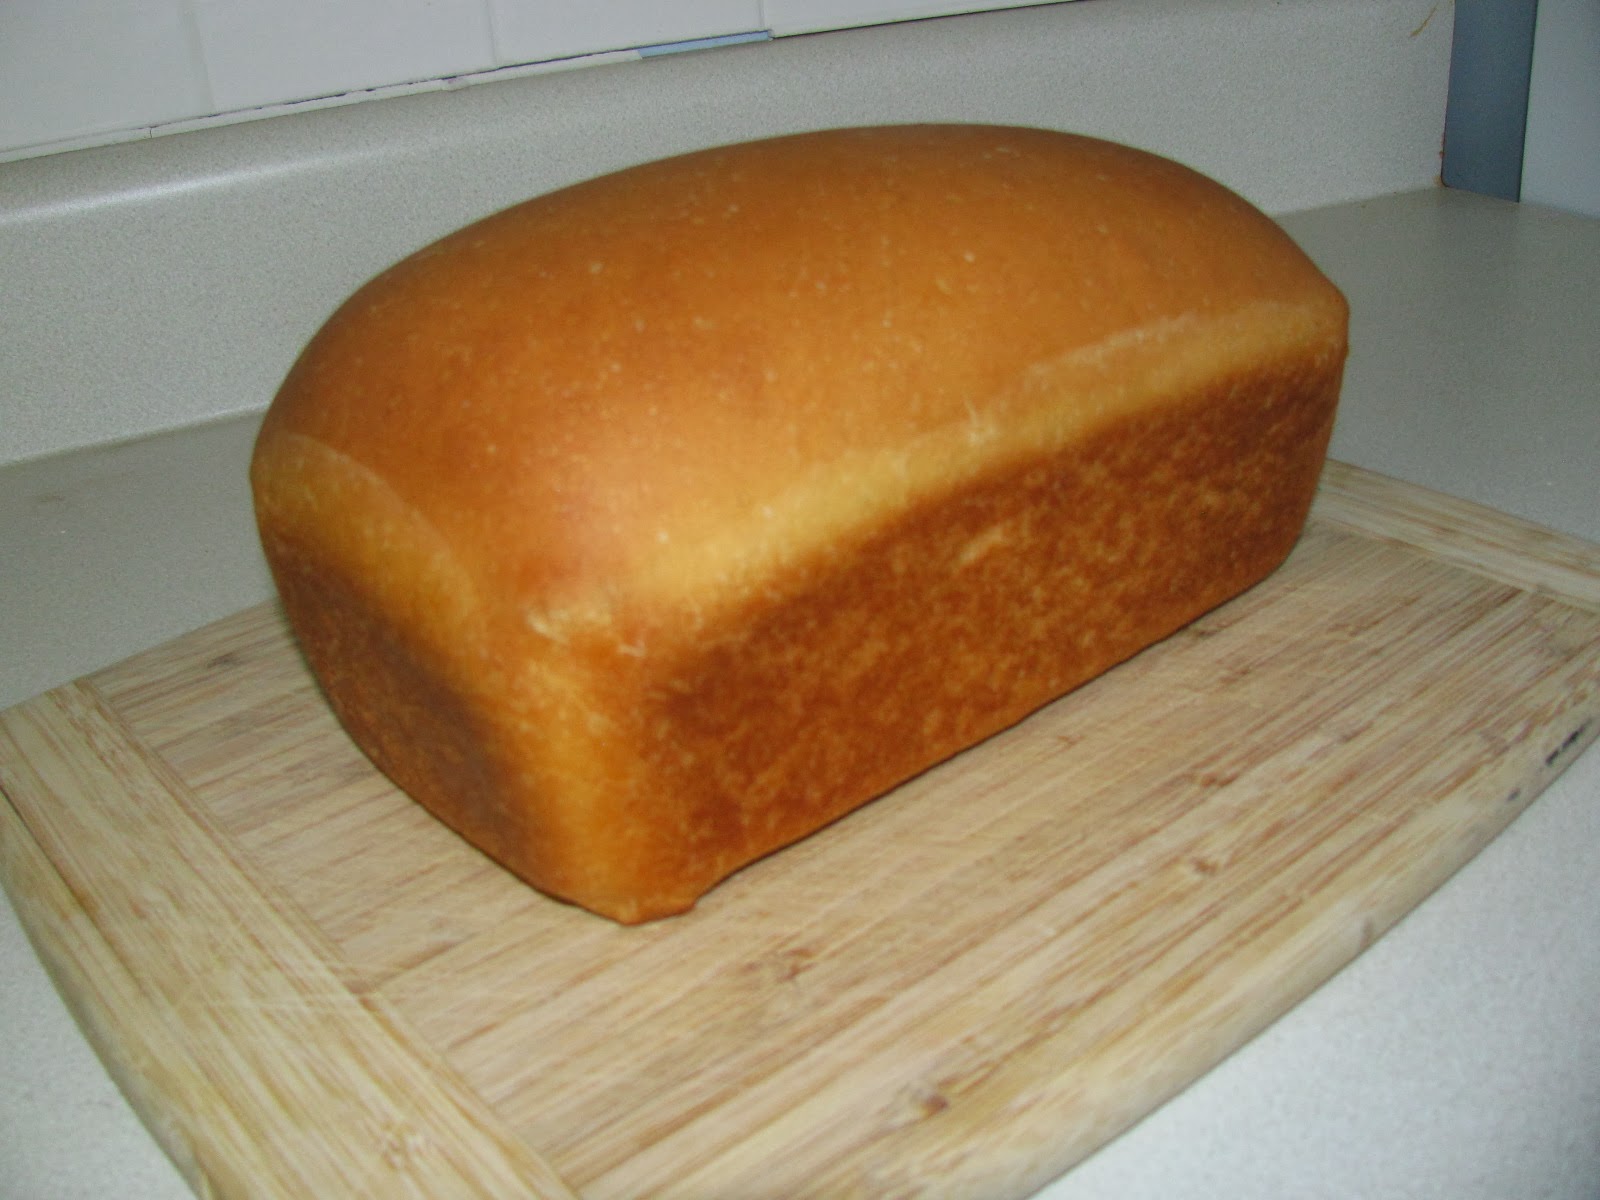
after 40 minutes baking it's done
mmmmmm...........


Tuesday, October 1, 2013

Real Tomatoes!

A Southern tradition and one of my favorites! Tomato sandwiches made with REAL, ripe, sweet/tart flavorful, heirloom garden grown tomatoes - white bread and Duke's mayonnaise.  The star of this show is a 'German Pink' purchased at the farmers market.  Life can hardly be better than this.  Next year Kenny and I will be growing our own - lots and lots of our own.