
Thursday, December 4, 2014
THE GREAT WALL (of jars)
Next to the kitchen there is a laundry room <slash> pantry where we store most of our dry good groceries -- flour, bakery ingredients, canned goods, rice , beans, and so forth. Part way through the gardening season and into the canning season we ran out of room. In the dining area we built this wall of shelves to hold all our current and future stock of home canned produce.
Preserves, Hot Sauce, Chiles, Relish, Dill Pickles, Bread & Butter Pickles, Tomatoes, Tomato Sauce, Spaghetti Sauce, Tomatillo Salsa, Baked Beans, Summer Squash, Sun-Dried Tomatoes, Pumpkin, Green Chile Enchilda Sauce, Dried Sage, Marjoram, Oregano, Ancho Chile Powder, Dried Parsley, Dried Cilantro, Cayenne Pepper Flakes. There is room for about 350 jars. I don't think it will be enough next year. We have frozen garden peas, green beans and Basil/Walnut Pesto too.
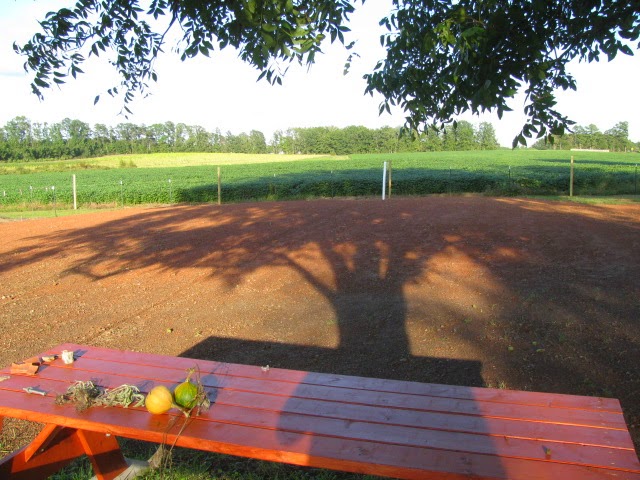
The New Lawn (aka Post Septic Tank Apocalypse)
After getting a new septic tank and new septic drain field installed (see earlier post - New Septic System - or How To Spend $600 An Hour) We had to wait for several good soaking rains to settle the ground, then move the soil around from the high spots to the low spots, then wait for more good rainfall and smooth out the ground again. This was no easy task. The area is about the size of a typical suburban lot - about a 1/4 acre. Once we had not waited long enough, but had had enough of looking a red clay dirt we raked the entire area one last time and spread fertilizer and grass seed over the area the day before a rain forecast.


9/26/2014 four days after seeding and a good rain
we have LIFT-OFF!! ..... uh... I mean germination!
10/1/2014 it's starting to look pretty good
10/4/2014 looking like a lawn almost
10/19/14 a thick green lawn!!
Tuesday, December 2, 2014
Halloween Pumpkins
I know, I know..... I haven't posted much on the blog in recent months. Busy, busy, busy. Today is a dreary cold drizzly day - a good day for catching up with blog postings.
This year's pumpkin carving was a minor disaster. Normally the pumpkins I buy for carving keep very well after carving, but this year they didn't. The complicated carving takes a couple of hours or more for each pumpkin so I usually start a few days before Halloween. Normally they still look nice and fresh on Halloween night. I'm sure the very warm day time temperatures for several days before the 31st and the not very cold nights didn't help, but I also think it had something to do with the locally grown pumpkin varieties just not keeping as well as what I'm used to.
So that's my excuse and I'm sticking to it. Here is a photo of the only carved pumpkin worthy of posting. It is, of course, the last pumpkin I carved on Halloween day, so it was fresh and not wilted.
Harvesting the wheat
OK - we didn't grow the wheat, but we did harvest some wheat this year. The adjoining property to the East has been planted in a rotation of tobacco followed by winter wheat and then by soy beans for many years. When my property was carved out of a larger parcel, a small portion of the crop land ended up on my side of the property line. It was planted in tobacco last spring before I purchased the property and last fall it was planted in wheat. This past summer I cleared the strip where the property line was and started digging post holes for a fence.

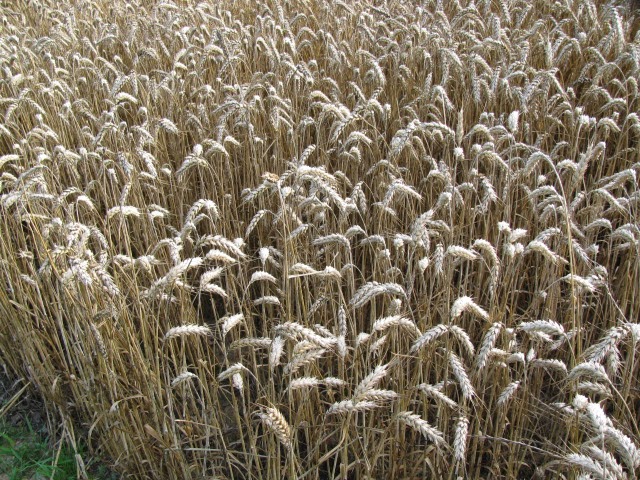


So this small corner patch of the wheat field is on my side of the property line.
The ripe wheat is ready to harvest -- I think? How do you know?
There are 2 ways to know when to harvest.
You pluck off a head of wheat from a stalk.......
.....and you rub it briskly between your palms......
....and blow away the chaff and then chew on a wheat kernel to see if it is dry enough.
......or......
you just wait until your neighbor shows up with this behemoth combine to harvest the wheat in the main field right on the other side of the fence. That's when you harvest your little patch.
So we hand cut about a 3rd of the wheat and threshed it by beating bundles of the stalks against the inside of a new, clean galvanized trash can. Then we removed all the chaff by pouring the wheat from a pan in front of a box fan. The wheat chaff blew away into the yard and the clean wheat kernels fell onto a tarp spread on the ground. We got about 40 pounds of wheat kernels that way. We expected the total we would get our patch would be about 100 to 120 lbs, but then we discovered why the wheat had been harvested the day it was. Oh, it was dry and ready to harvest, but more importantly it rained heavily the next day knocking all the remaining standing wheat kernels to the ground. Oh well, it was fun while it lasted.
No I didn't buy a $200, or $400 or $1,000 mill to make $20 worth of flour. We used the wheat as part of a cover crop mix with clover to plant in idle parts of the garden.
Tuesday, August 26, 2014
Salt Marsh Moth
 |
| Estigmene acrea (Salt Marsh Moth) |
Saturday, August 23, 2014
New Septic System.... or How to spend $600 an hour without even trying!
After consulting with a certified soil scientist (a neighbor who lives less than a mile from our house) we had the contractor here last week to install a new septic tank and new drain field. A one day job costing $5000.00! but hey - we're good for another 75 years - more or less.
 |
| First you find the old septic tank and pick a spot on the sewer line between the house and the tank where there is a joint in the cast iron pipe |
 |
| Then you dig a trench from the sewer line to the chosen spot for the new septic tank, dig a pit for the new tank and continue the trench to the spot where the new distribution box will be placed for the drain field |
 |
| Pipe in the trench leading to the new "D-Box" |
 |
| New "D-Box" for 4 drain field lines |
 |
| Next you dig a 65 foot long 6 1/2 foot deep trench across the slope of the land following the ground contour |
 |
| You put these bundles of Styrofoam peanuts 3 wide into the trench with the perforated pipe running through the middle bundle all connected together in a line with a bundle of Styrofoam peanuts without a pipe in it on each side |
 |
| Like this |
 |
| Then you dig three more identical trenches parallel to the first turning the entire back yard into a re-enactment of WWI trench warfare |
 |
| Next the new septic tank goes in. Everything gets connected together. Sewer line from the cast iron pipe into the septic tank - solid drain pipe from the septic tank to the "D-Box" - 4 solid drain pipes from the "D-Box" to each 65 foot perforated peanut wrapped drain line. |
 | ||
| Last everything is buried and smoothed out. Done! |
Tuesday, August 5, 2014
Canning Mania!

Some of the stuff I've canned this past week! Tomato sauce, Tomatillo salsa, Green chile enchilada sauce, Dill pickles, Sweet bread & butter pickles, Summer squash mix, Crushed tomatoes, and lots of dried tomatoes. There is also stuff in the freezer like Ratatouille, NY pushcart onion sauce, and Pesto
The garden is in full swing. So far we've harvested:
20 lbs of zucchini, yellow crookneck and golden scallop squash
60 lbs of onions - yellow, white, red and chippolini
28 lbs of tomatoes for making sun dried tomatoes
20 lbs of other slicing and cherry tomatoes
13 lbs of cucumbers
10 lbs of Hatch chiles
plus cayenne peppers, eggplant, pole beans, snap beans, basil and sage
Monday, August 4, 2014
Panzanella
So what do you do when you have a loaf of crusty bread you baked yesterday and a garden full of ripe red tomatoes and fresh basil?

You make Panzanella!

The bread is an easy no-knead wet dough loaf that rises overnight. The Basil is Genovese type from Italian imported seeds and the tomatoes are Costoluto Fiorentino, also from Italian seeds. There is a rule about heirloom garden tomatoes - the uglier and gnarly the tomato - the better and tastier it is - so you can guess that these are spectacular tomatoes!
The recipe? - Oh yeah, the recipe. If you can't figure it out from the photos...... well - just saying.
OK - not to be rude to the culinary challenged - Cut some of the bread into cubes and dry it out in the oven on a cookie sheet. 300 degrees for 5-10 minutes, or use stale bread. Drizzle with olive oil. Chop the tomatoes and add them and any juice too. Tear up the Basil and add that. Sprinkle a little salt and pepper and toss. It is common to sprinkle a little red wine vinegar over the finished salad. I like it that way. It's also common in Northern Italy to add some shaved Parmesan - which I also like but don't have any..... tsk, tsk. In Tuscany, where this dish originated, they don't usually add cheese.
How 'bout that food styling backdrop in the photos! I wanted to hide all the stuff on the kitchen counter - FLASH! I'll prop up some of my color coded cutting boards! Yeah lame, I know. Get over it. It's less distracting than the clutter on the counter.
Wednesday, July 23, 2014
Random Nature
There is something gratifying about coming across some random bit of the natural world on our property. Bumble Bees buzzing in the squash blossoms, a Preying Mantis perched on the string weaving in the tomato patch, Wild roses blooming next to the road. I always pause to admire. I am NEVER in such a hurry to miss the opportunity to enjoy the natural world around me. And it pleases me that the habitat right here in my yard supports a diversity of life.
 |
| Early morning dew on a clothes line spider web. Made last night in the still air, it will be gone when mid morning breezes dry it out and blow it away. She will make another tonight. |
 |
| Little green frog on an Acorn squash leave - acting nonchalant while eying the squash bug. |
 |
| Frog eggs (no relation to the little green frog) in the seep down by the back of the property. |
Monday, July 21, 2014
Tomatillo Salsa
Ingredients:
2 lbs fresh tomatillos
1 large white onion (yellow is OK too)
4 large cloves of garlic
4 medium Hatch New Mexico green chiles (gotta be the real thing! - aaah, no they don't - if you use Anaheim chiles from the grocery store you probably will want to add a jalapeno chile for some heat)
1 tsp salt
1/4 tsp fresh ground black pepper
2-3 Tbs fresh squeezed lime juice.
1-2 tsp olive oil
1/4 cup chopped cilantro
water as needed
Method:
Remove the husks and wash the tomatillos. If you have never used tomatillos before - don't be freaked out by their sticky feel - that's normal and OK and goes away when cooked.
Roast the chiles on the grill outdoors (my method) or under the broiler or right on gas stove top burner until they are charred all over and look like this.
Put the roasted chiles in a bowl, cover tightly with plastic wrap and set aside for 20 minutes to steam.
When the chiles are cool, cut off the tops, peel off and discard the charred skins.
In a roasting pan - put the whole tomatillos, rough chopped onion, rough chopped garlic and the rough chopped roasted peeled green chiles (and rough chopped jalapeno, if using). Add the oil and toss to coat. Sprinkle on the salt, pepper, and lime juice.
Roast in a preheated 375 degree oven for one hour until the tomatillos are tender and blackened a bit in spots. Puree the roasted veggies in a blender or food processor, adding water as needed to get the right consistency. What is the right consistency you ask? I give up - what is the consistency you like? That's the right consistency. Serve warm or at room temperature. Add the fresh chopped cilantro just before serving. Lasts a week in the fridge. Great as tortilla chip dip, of course, but also great as a taco sauce or green enchilada sauce (although I make a different green chile enchilada sauce - smooth Sante Fe style for chicken enchiladas. I'll post that recipe when all the chiles are ready to harvest.)
I made a larger batch of salsa from the 3 1/2 lbs of tomatillos we harvested yesterday and adjusted the proportions of the other ingredients accordingly. I canned the sauce in pints jars - so after roasting the veggies I transferred it all to a sauce pan, used an immersion blender to puree it, adding enough water to make a sauce just a little thinner than canned tomato sauce. I pressure canned it - processing the jars for 20 minutes at 10 psi so I did not have to worry about it being acidic enough for water bath canning.
2 lbs fresh tomatillos
1 large white onion (yellow is OK too)
4 large cloves of garlic
4 medium Hatch New Mexico green chiles (gotta be the real thing! - aaah, no they don't - if you use Anaheim chiles from the grocery store you probably will want to add a jalapeno chile for some heat)
1 tsp salt
1/4 tsp fresh ground black pepper
2-3 Tbs fresh squeezed lime juice.
1-2 tsp olive oil
1/4 cup chopped cilantro
water as needed
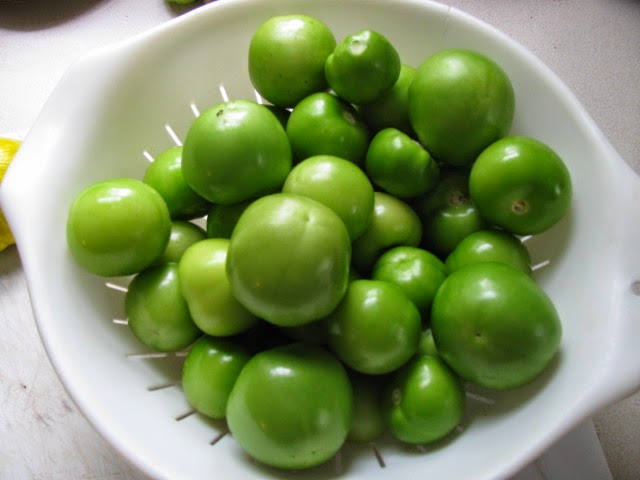
 |
| Tomatillos - just picked |
Remove the husks and wash the tomatillos. If you have never used tomatillos before - don't be freaked out by their sticky feel - that's normal and OK and goes away when cooked.
 |
| Tomatillos - husked, washed and ready. |
 | |
| The other stuff - the onion and the green chiles are from our garden - next year the garlic will be too. |
 |
| Roasted New Mexico green chiles |
When the chiles are cool, cut off the tops, peel off and discard the charred skins.
In a roasting pan - put the whole tomatillos, rough chopped onion, rough chopped garlic and the rough chopped roasted peeled green chiles (and rough chopped jalapeno, if using). Add the oil and toss to coat. Sprinkle on the salt, pepper, and lime juice.
Roast in a preheated 375 degree oven for one hour until the tomatillos are tender and blackened a bit in spots. Puree the roasted veggies in a blender or food processor, adding water as needed to get the right consistency. What is the right consistency you ask? I give up - what is the consistency you like? That's the right consistency. Serve warm or at room temperature. Add the fresh chopped cilantro just before serving. Lasts a week in the fridge. Great as tortilla chip dip, of course, but also great as a taco sauce or green enchilada sauce (although I make a different green chile enchilada sauce - smooth Sante Fe style for chicken enchiladas. I'll post that recipe when all the chiles are ready to harvest.)
I made a larger batch of salsa from the 3 1/2 lbs of tomatillos we harvested yesterday and adjusted the proportions of the other ingredients accordingly. I canned the sauce in pints jars - so after roasting the veggies I transferred it all to a sauce pan, used an immersion blender to puree it, adding enough water to make a sauce just a little thinner than canned tomato sauce. I pressure canned it - processing the jars for 20 minutes at 10 psi so I did not have to worry about it being acidic enough for water bath canning.
 |
| The finished Tomatillo Salsa |
Tuesday, July 15, 2014
Basil Laundry!
We have a huge amount of Basil growing. I've been making and freezing Pesto and now it's time to preserve some of it by drying. This is about 10% of the Basil we have growing. Really - maybe 10%. Oh - we're having pizza tonight with lots of fresh Basil on it - that will use up about .0001% of the fresh Basil - more or less. I've gotta make more Pesto!

Garden Update Photos
 |
| foreground left - Red onions, tops falling over, almost ready to pull; foreground center - Chippolini onions almost ready. Background left - yellow onions; background center - white onions. On the right are Leeks. |
 |
| Closer view of yellow onions on the left and white onions on the right. They are about as big as they are going to get and the tops are starting to fall over. They will be ready to harvest fairly soon - then dried and stored. We have a total of around 300+ onions between the 4 varieties we are growing. |
 |
| Yellow onion straight from the garden. They don't need to be dried and stored before using. They can be pulled and used right away. This one was turned into sliced grilled onion to top off some bacon cheeseburgers. |
SWISS CHARD
 |
| Pick larger outside leaves. The smaller inner leaves will continue to grow and new leaves will sprout. |
 |
| Large leaves washed and ready to prepare. |
 |
| Tear off the green leafy part and chop the center stem into bite size pieces |
Saute the stems in a combination of butter, olive oil and white wine for 5 minutes. Add a clove on minced garlic and saute for 30 seconds. Add the leafy green parts, a little lemon juice, salt & pepper and saute until the greens are wilted. Remove from the heat. Add a little Parmesan cheese. Serve.
THINGS THAT ARE GROWING!!
 |
| Pumpkin and Watermelon vines |
 |
| Sugar Pie Pumpkin |
 |
| Acorn squash |
 |
| Poblano peppers |
 |
| Fennel |
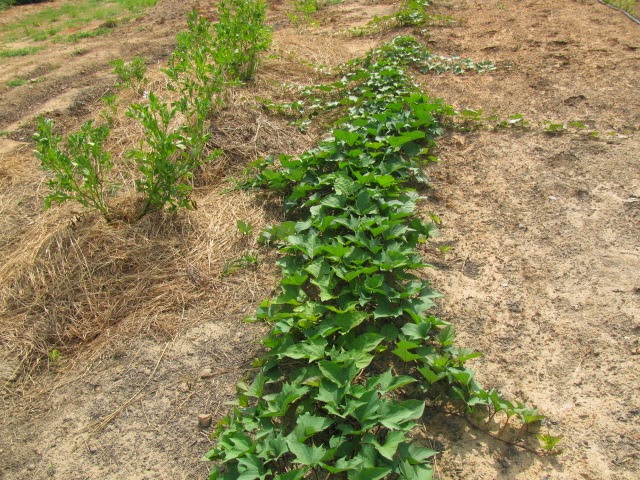 |
| Sweet potato vines |
 |
| 2nd planting of tomatoes - we are going to let these sprawl on the ground |
 |
| Kentucky wonder pole beans |
Sun Dried Tomatoes
I think the secret to good sun dried tomatoes is....... wait for it........ THE TOMATO! Brilliant huh?
I grow Principe Borghese tomatoes from seeds imported from Italy. They are the traditional variety grown for making sun dried tomatoes - tart sweet, meaty and just the right size to cut in half and dry nicely.
Trying this in the humid Southeast is new to me. I plan on bringing in the tomatoes every evening so they are not dampened by dew (or rain) during the night and early morning and putting them back out mid morning when everything is dry.
I grow Principe Borghese tomatoes from seeds imported from Italy. They are the traditional variety grown for making sun dried tomatoes - tart sweet, meaty and just the right size to cut in half and dry nicely.
 |
| A few of the 28 Principe Borghese tomato plants growing this season. |
 |
| Slice the tomatoes in 1/2 lengthwise - stem to blossom end |
 |
| Two simple frames made from 1x2 furring attached together with small butt hinges and held closed with a clasp |
 |
| Window screen stapled to the inside of each frame - ready for the 'maters! |
 | |||||||||||||||||||||
| Arrange the sliced tomatoes cut side up; close and latch the frames together; place in the bright hot sun for a few days. |
Subscribe to:
Comments (Atom)